Product Guides
Launch a custom KPI campaign and collect values from data owners
Once you have a KPI group, you collect its values through campaigns: one per reporting period. This guide shows how to create a campaign, assign data owners, launch it, and follow the responses.
Before you start
You need an Editor role in your Dcycle organization.
Steps
Step 1
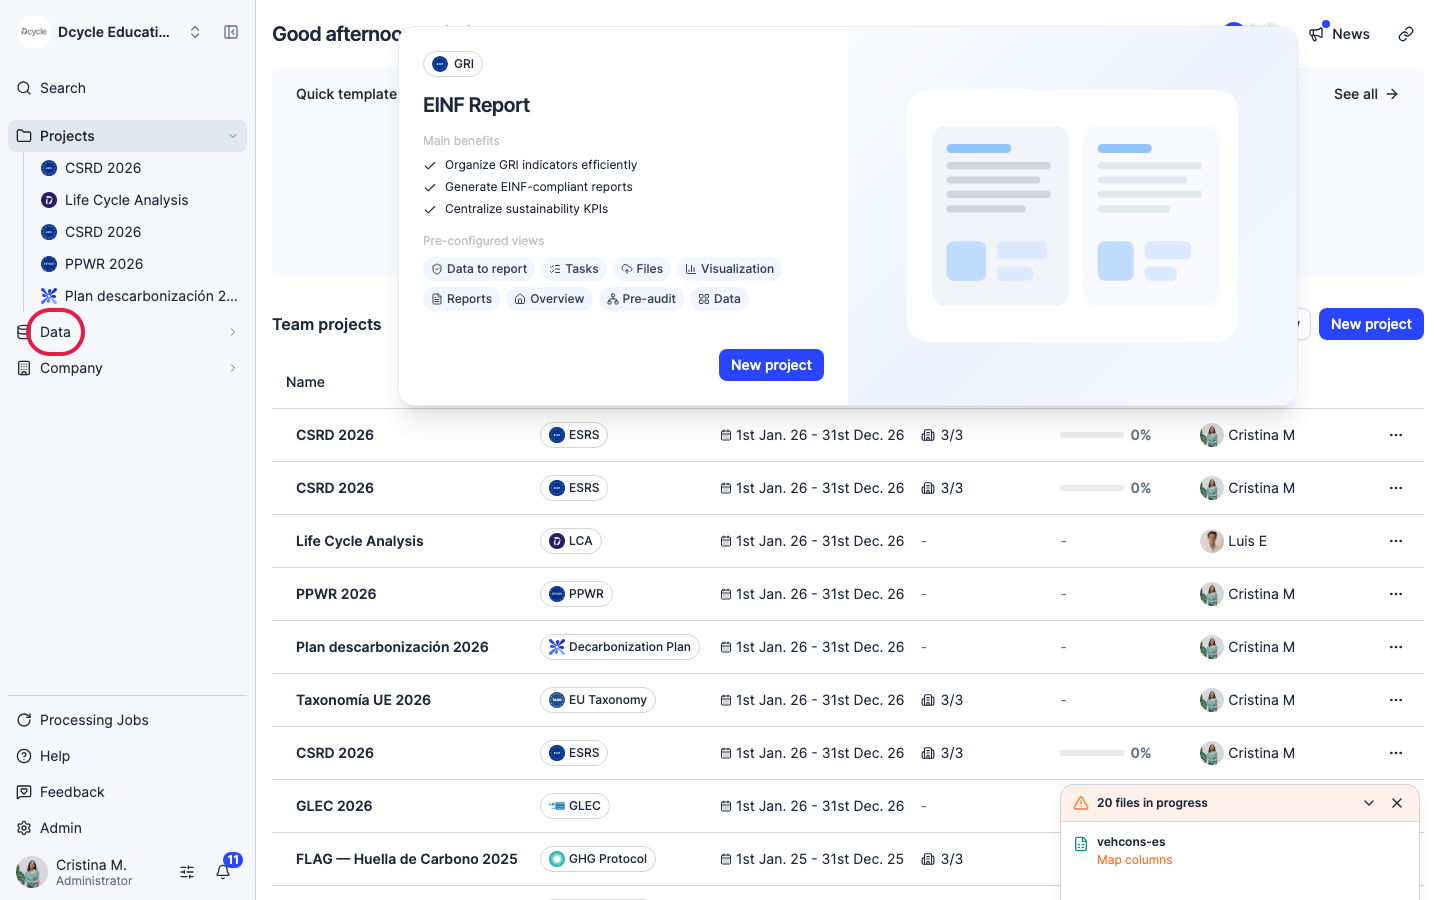
Click “Data” in the left navigation.
Step 2
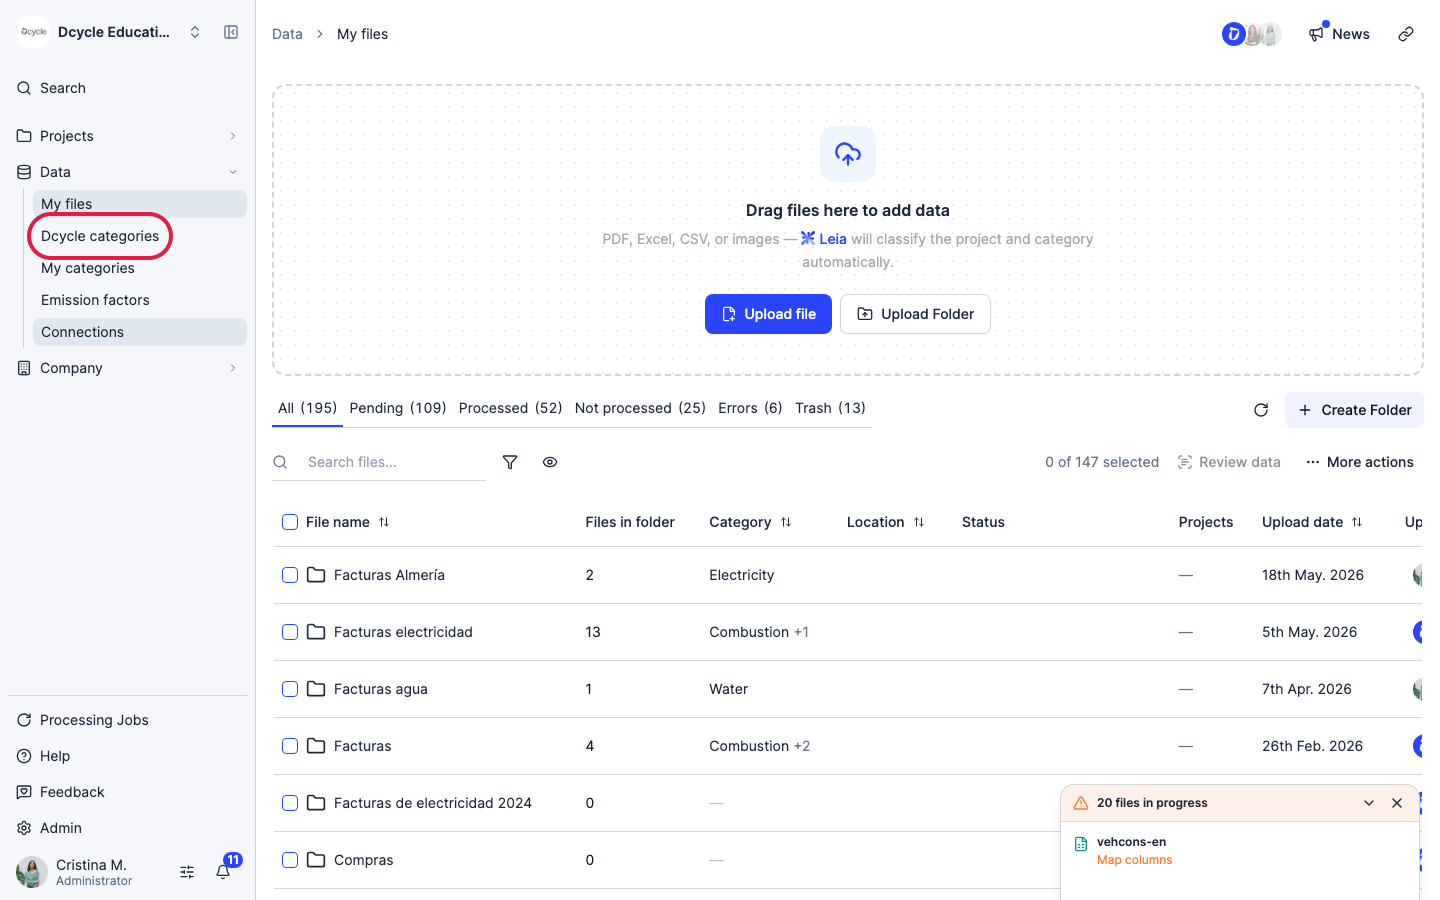
Open “Dcycle categories”.
Step 3
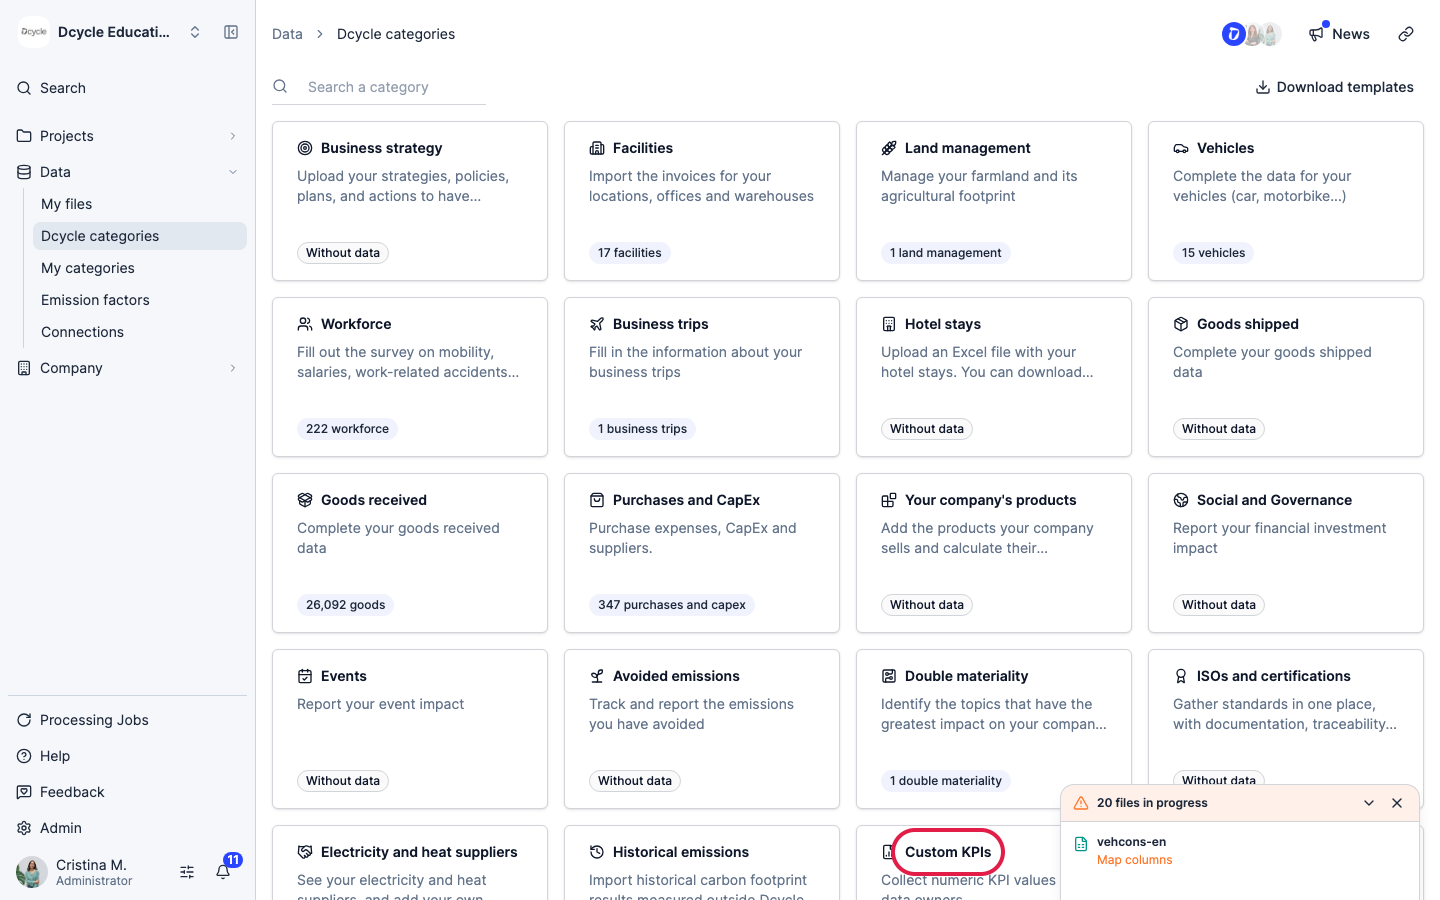
Find the “Custom KPIs” card and click it.
Step 4
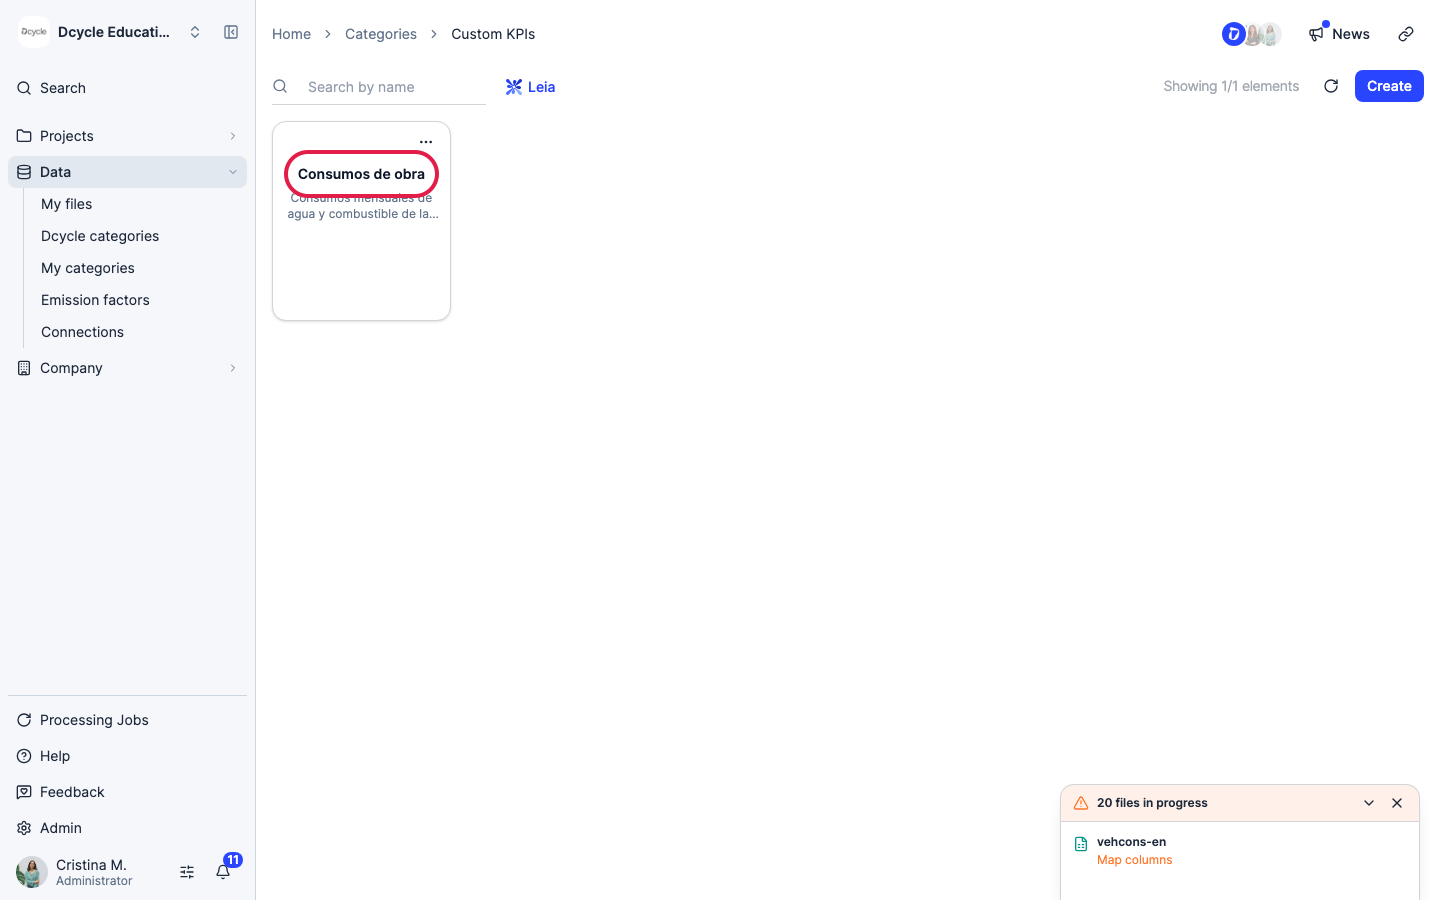
Open the KPI group you want to collect values for. If you don’t have one yet, create it first (see “Create custom KPIs”).
Step 5
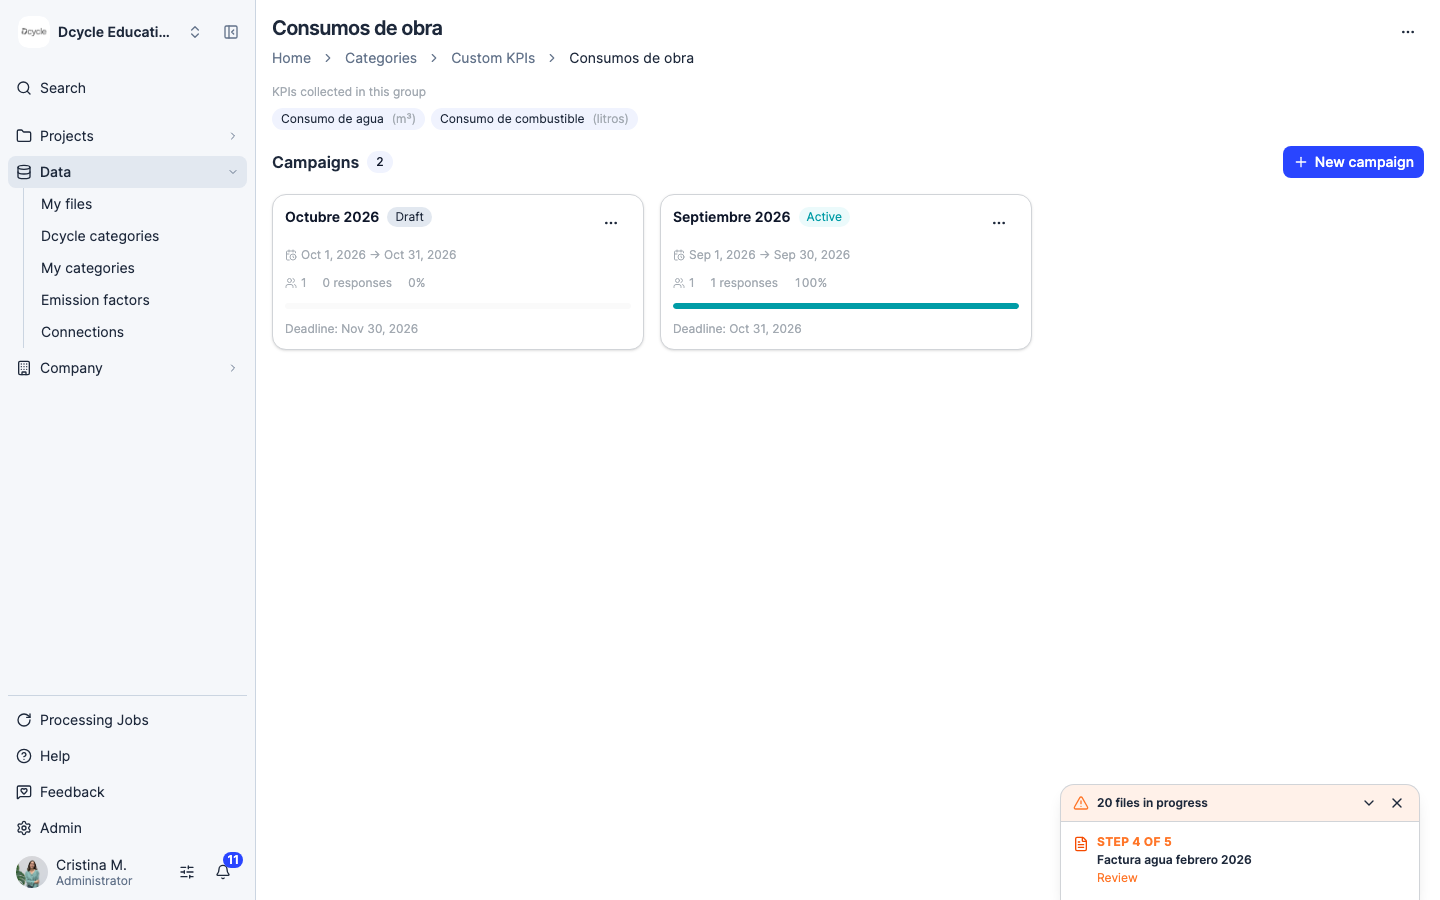
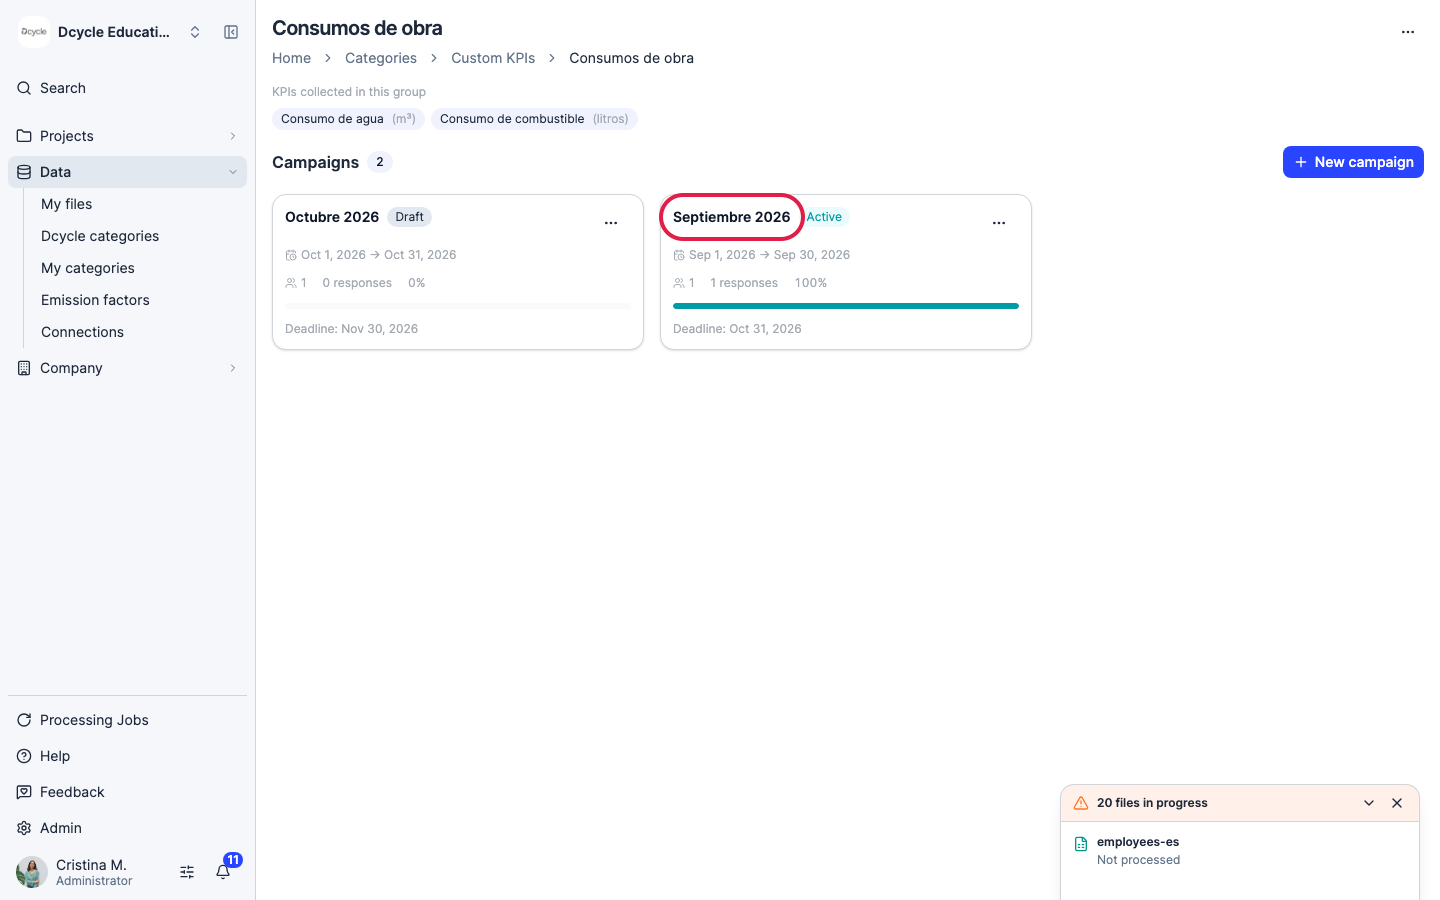
The group page lists its campaigns. Each card shows the period, the number of data owners, how many have answered and the deadline. A campaign is a Draft while it has data owners but hasn’t been launched, and Active once launched.
Step 6
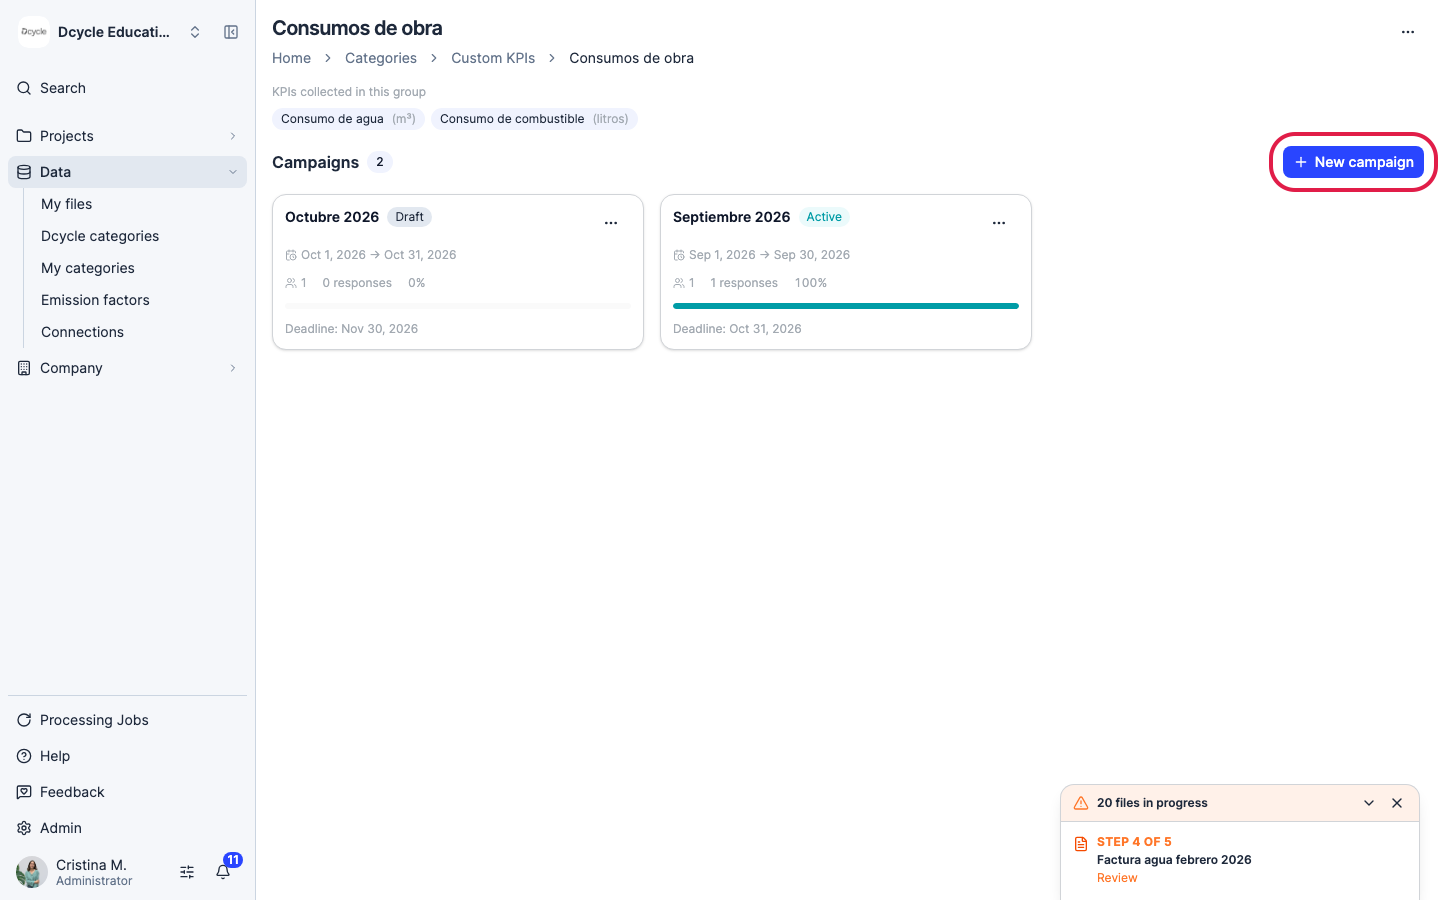
Click “New campaign”.
Step 7
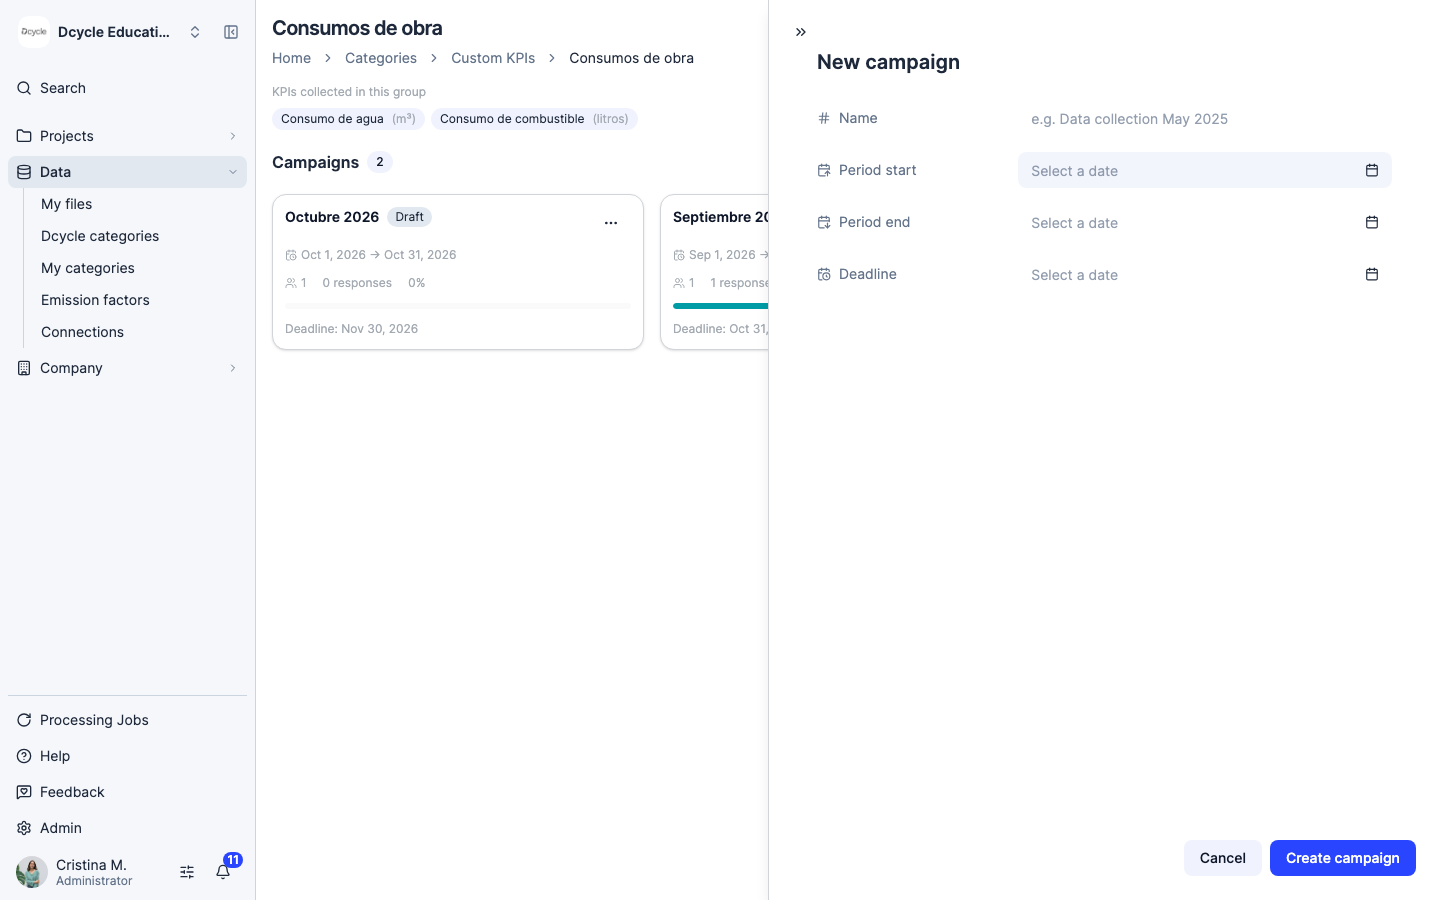
Give the campaign a “Name” (for example the month or quarter), the period it covers (“Period start” and “Period end”) and a “Deadline”. When you set the deadline, the form shows the automatic reminders that data owners will receive: 7, 3 and 1 day before. Click “Create campaign”. Creating a campaign doesn’t send any email.
Step 8
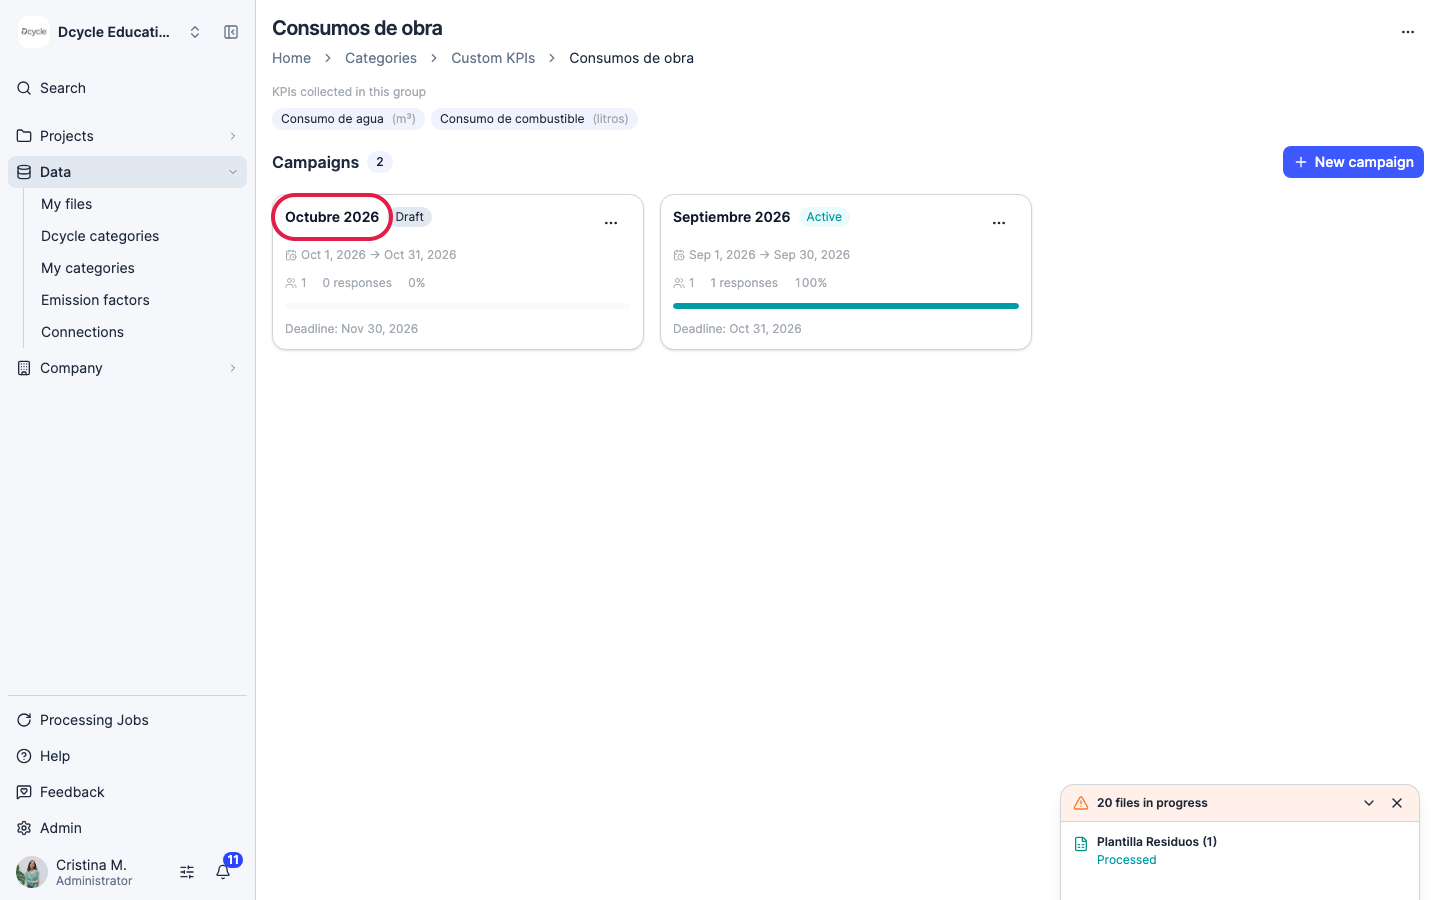
Open the campaign to manage its data owners and responses.
Step 9
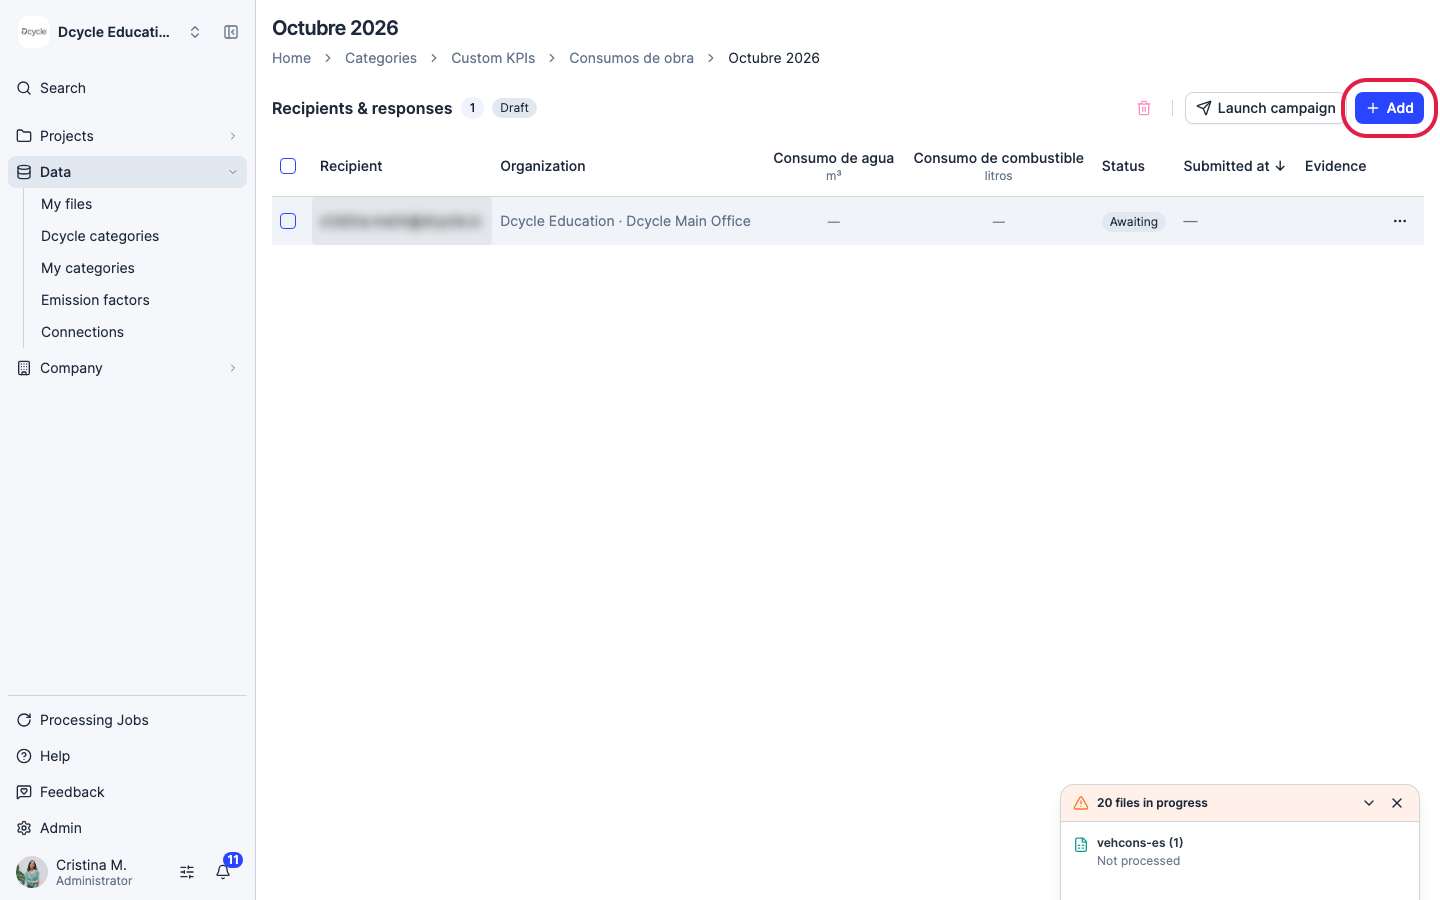
Click “Add”.
Step 10
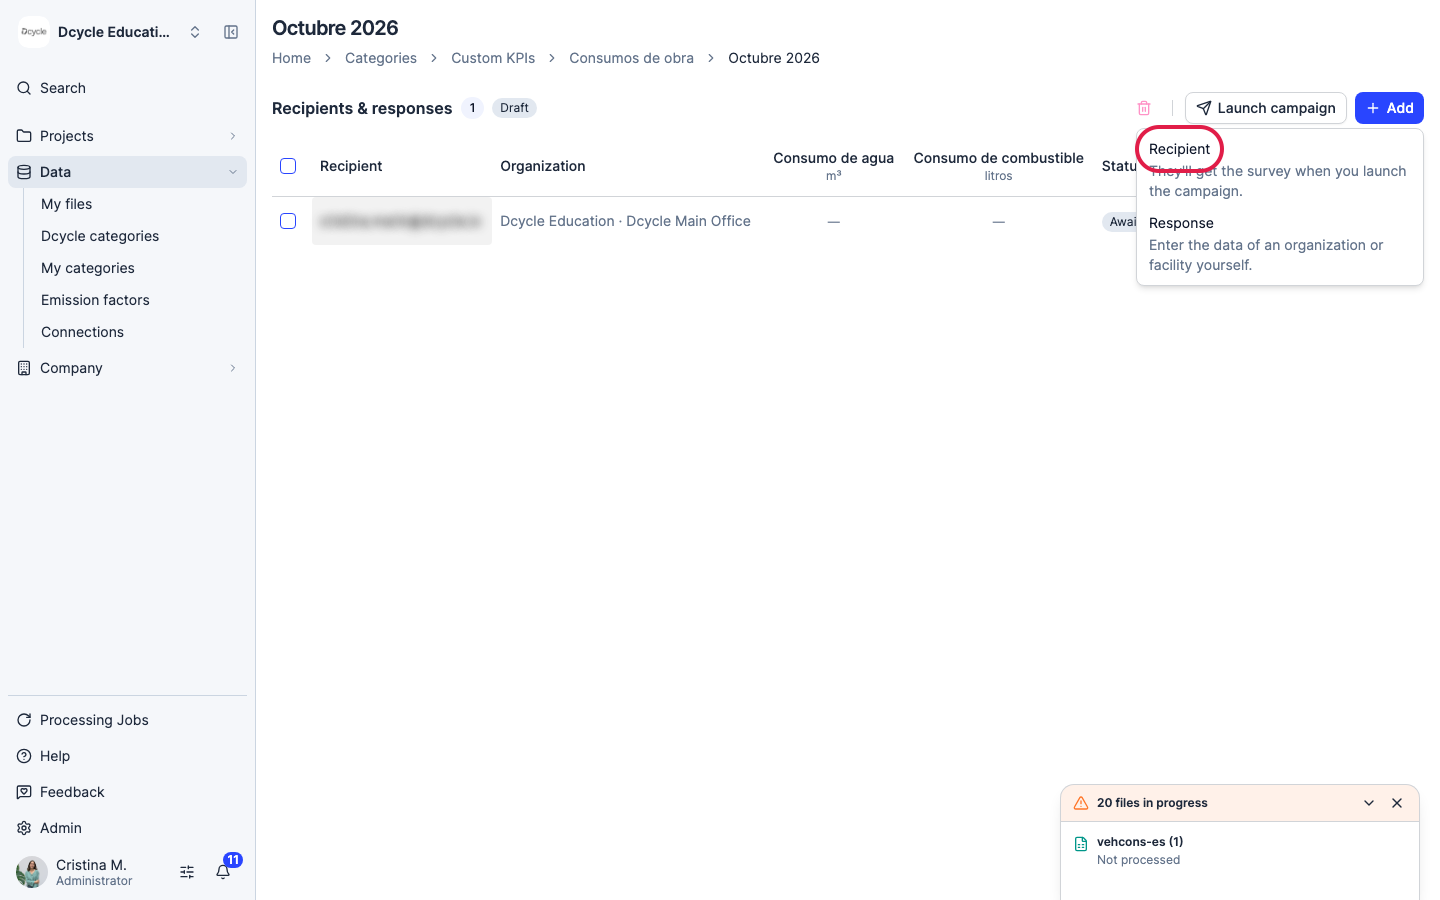
Choose “Recipient” to assign a data owner who will receive the survey when you launch the campaign, or “Response” to enter the values yourself for an organization or facility.
Step 11
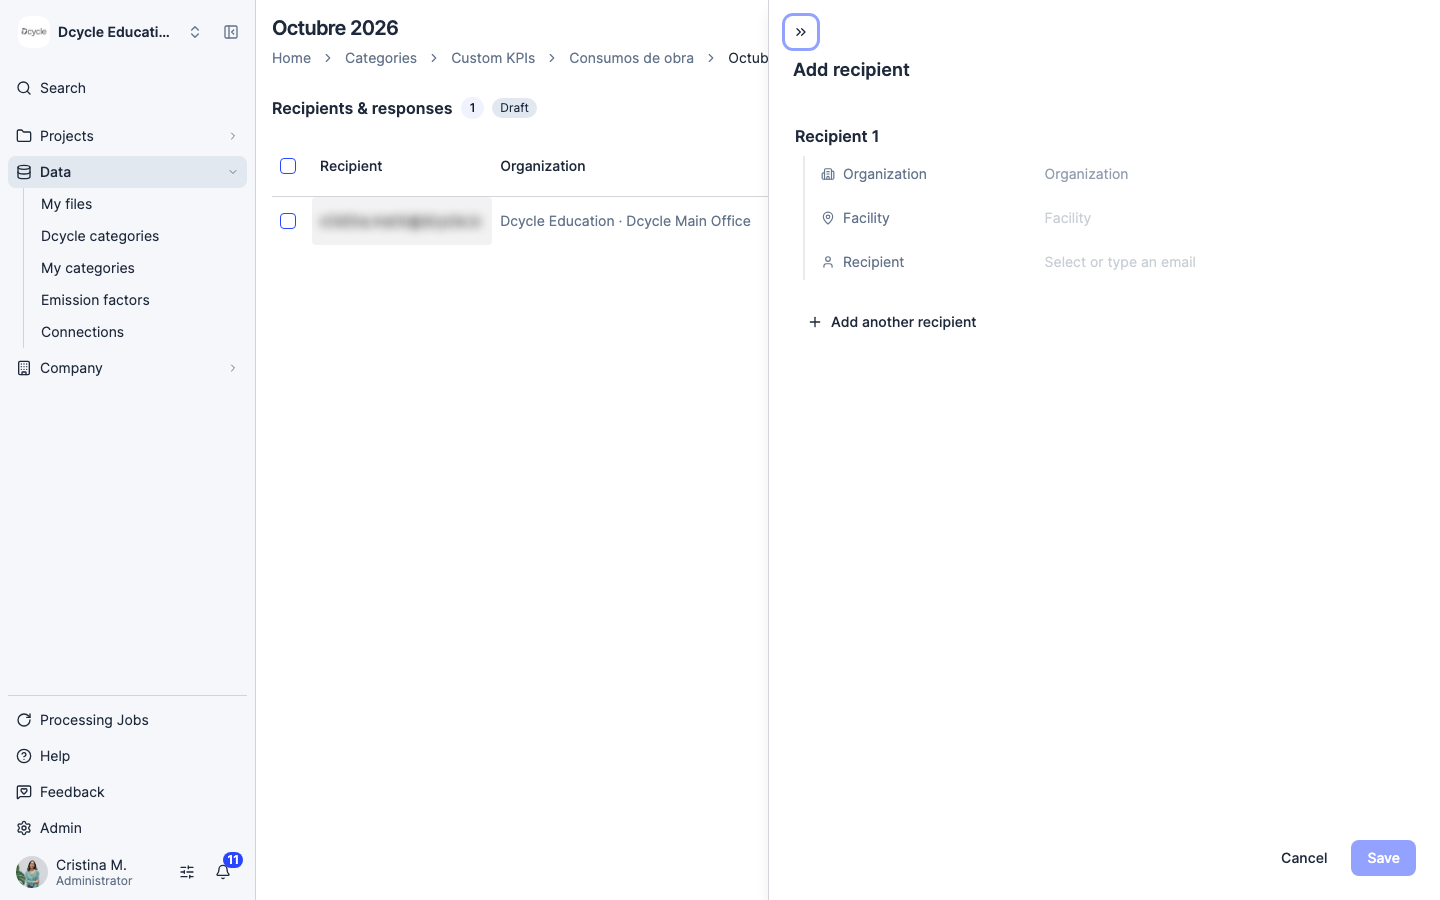
For each recipient, pick the “Organization”, optionally a “Facility”, and in “Recipient” the email of the person who will report it: a team member or any external email. Use “Add another recipient” to assign several people at once, then click “Save”. Each organization and facility can only have one data owner per KPI group, and data owners are reused in the group’s next campaigns.
Step 12
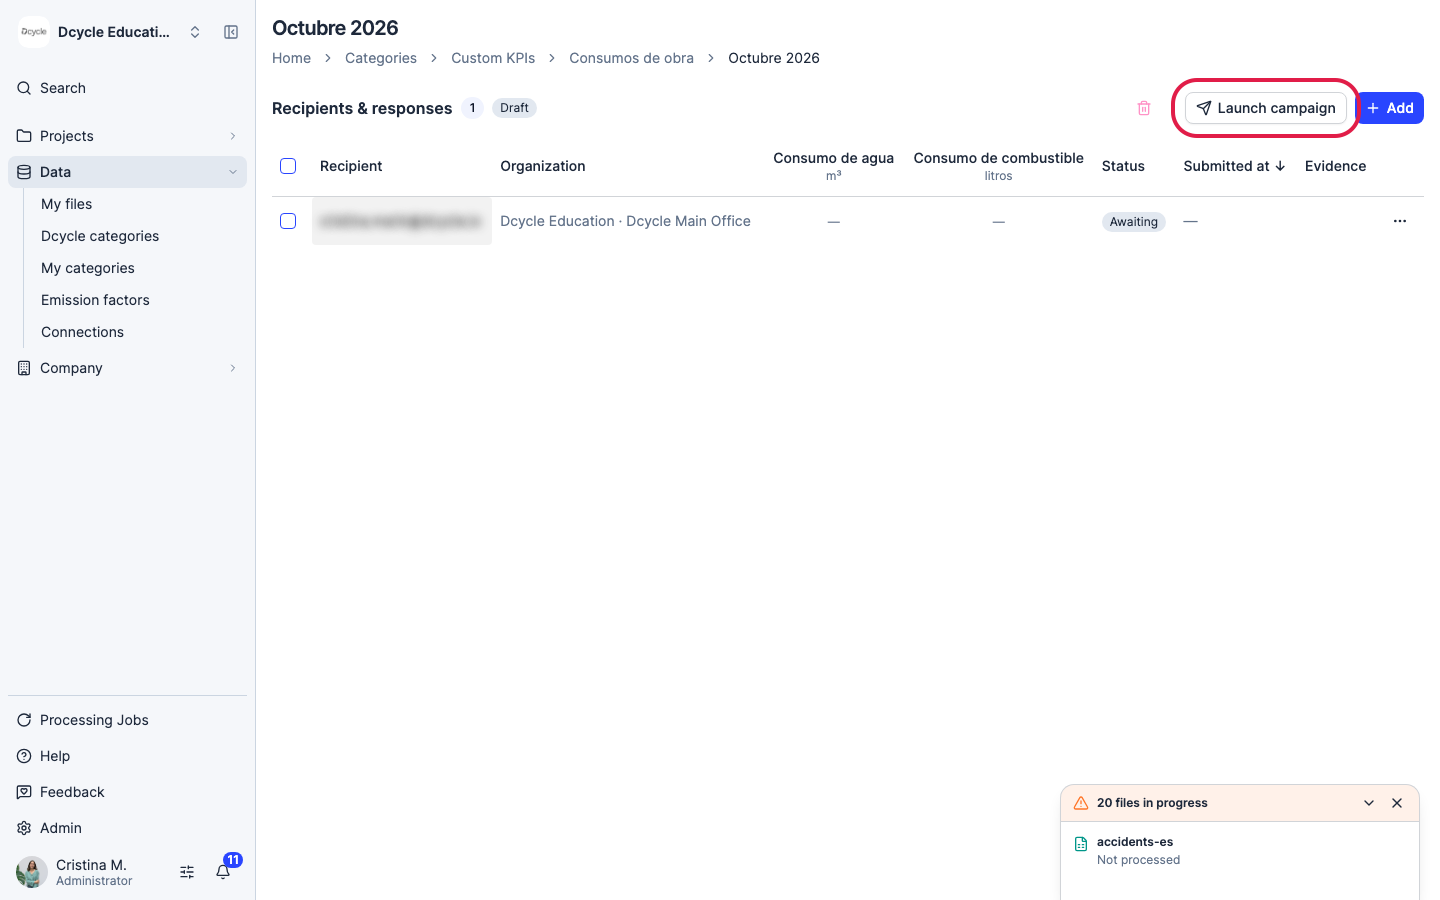
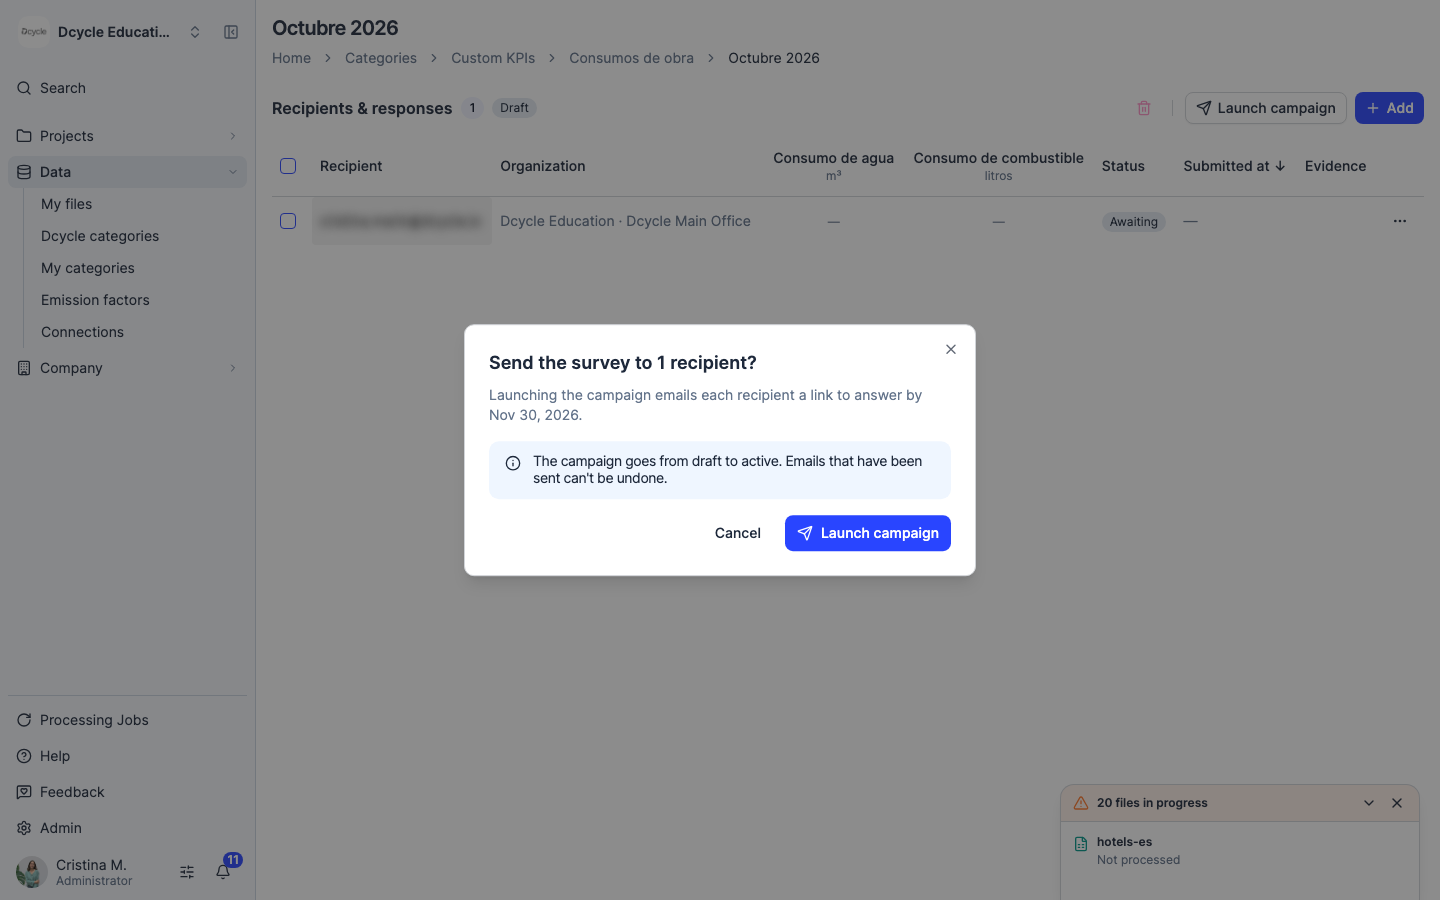
When the data owners are ready, click “Launch campaign”.
Step 13
Confirm with “Launch campaign”. Every recipient receives an email with a link to answer before the deadline, and the campaign moves from Draft to Active. Sent emails can’t be undone. If you add more data owners later, launching again only emails the new ones.
Step 14
This is the email data owners receive. The button in the email opens their survey directly: they don’t need a Dcycle account.
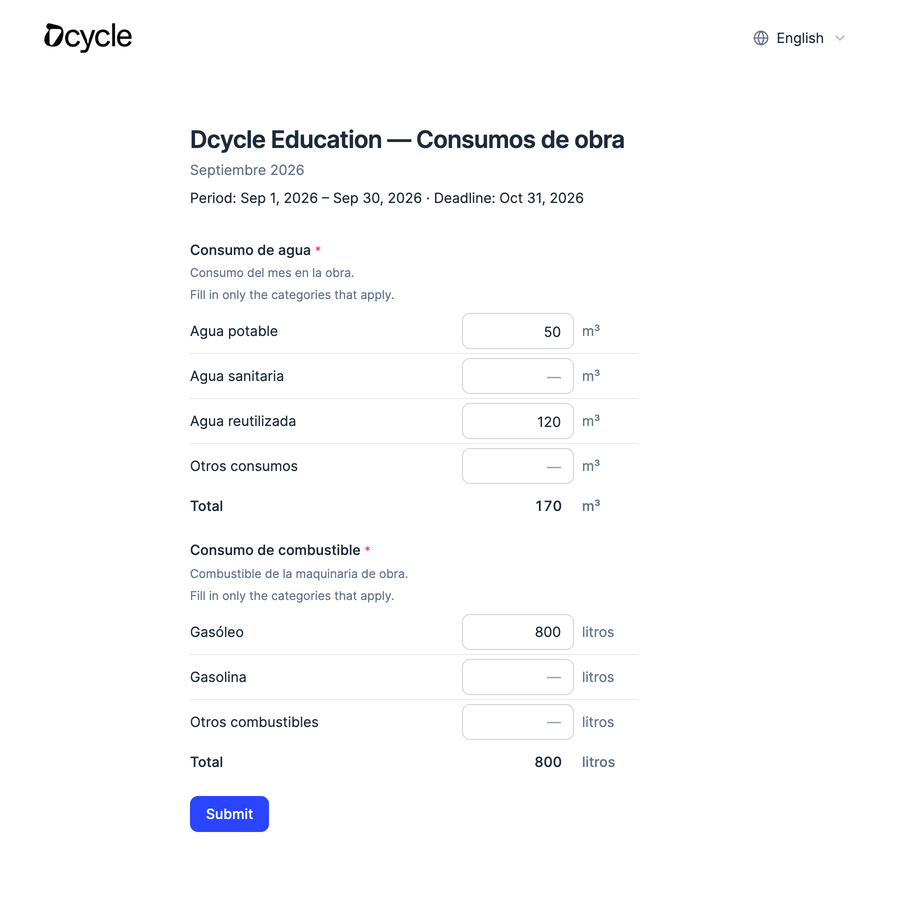
Step 15
The form shows the campaign period and deadline, and one block per KPI. For “Number by category” KPIs, data owners fill in only the categories that apply and the total is calculated automatically. They can switch the form’s language at the top right. Once they click “Submit”, the response is recorded and they can’t edit it again without a new invitation.
Step 16
Open a launched campaign to follow its responses.
Step 17
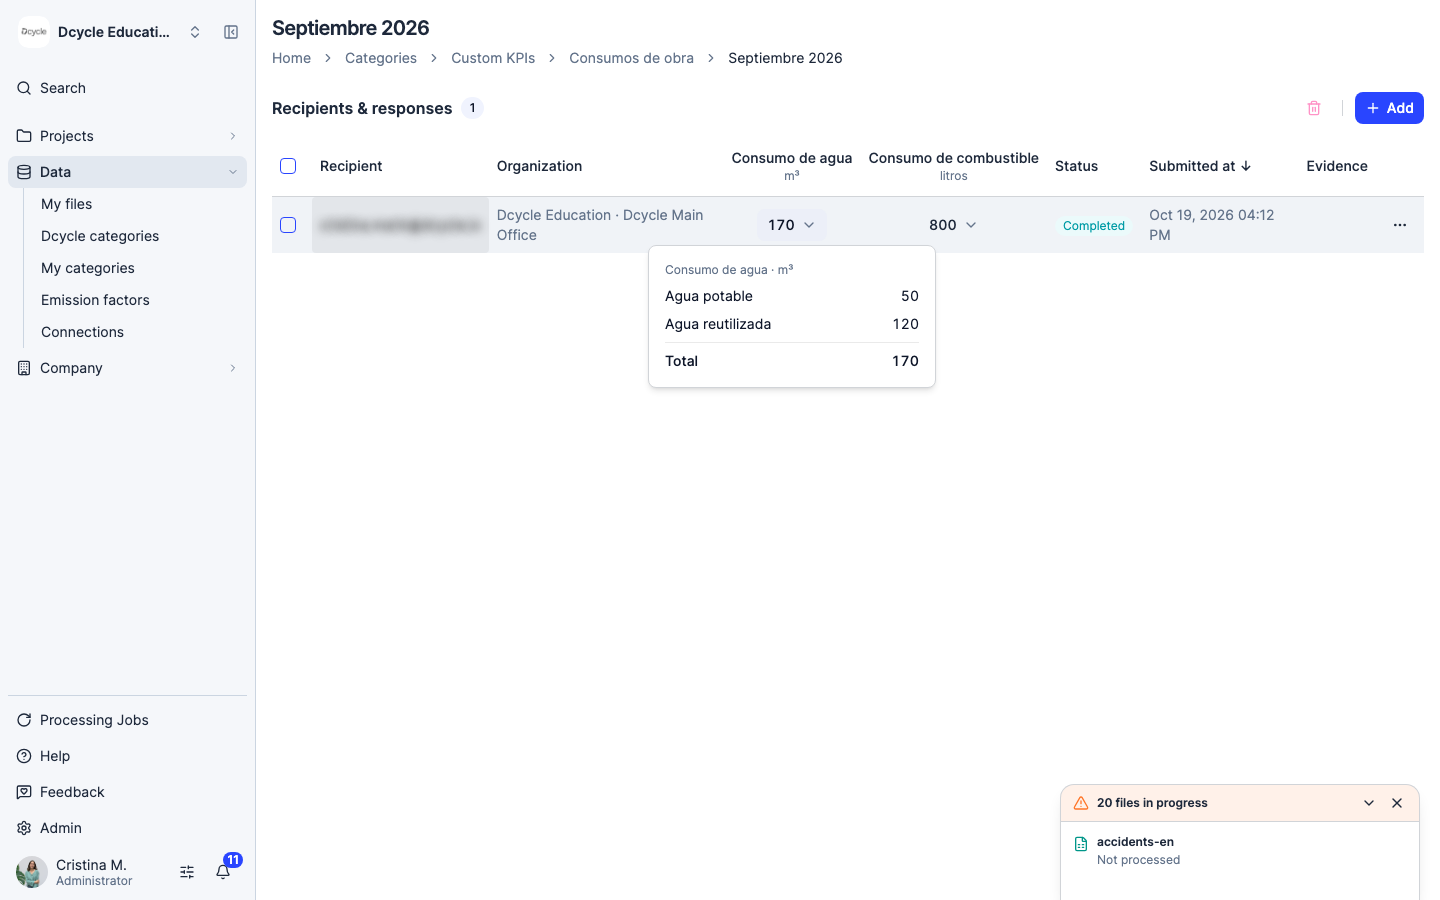
The table shows each recipient’s status (Awaiting or Completed), when they answered, and one column per KPI with its total. For a “Number by category” KPI, click the figure.
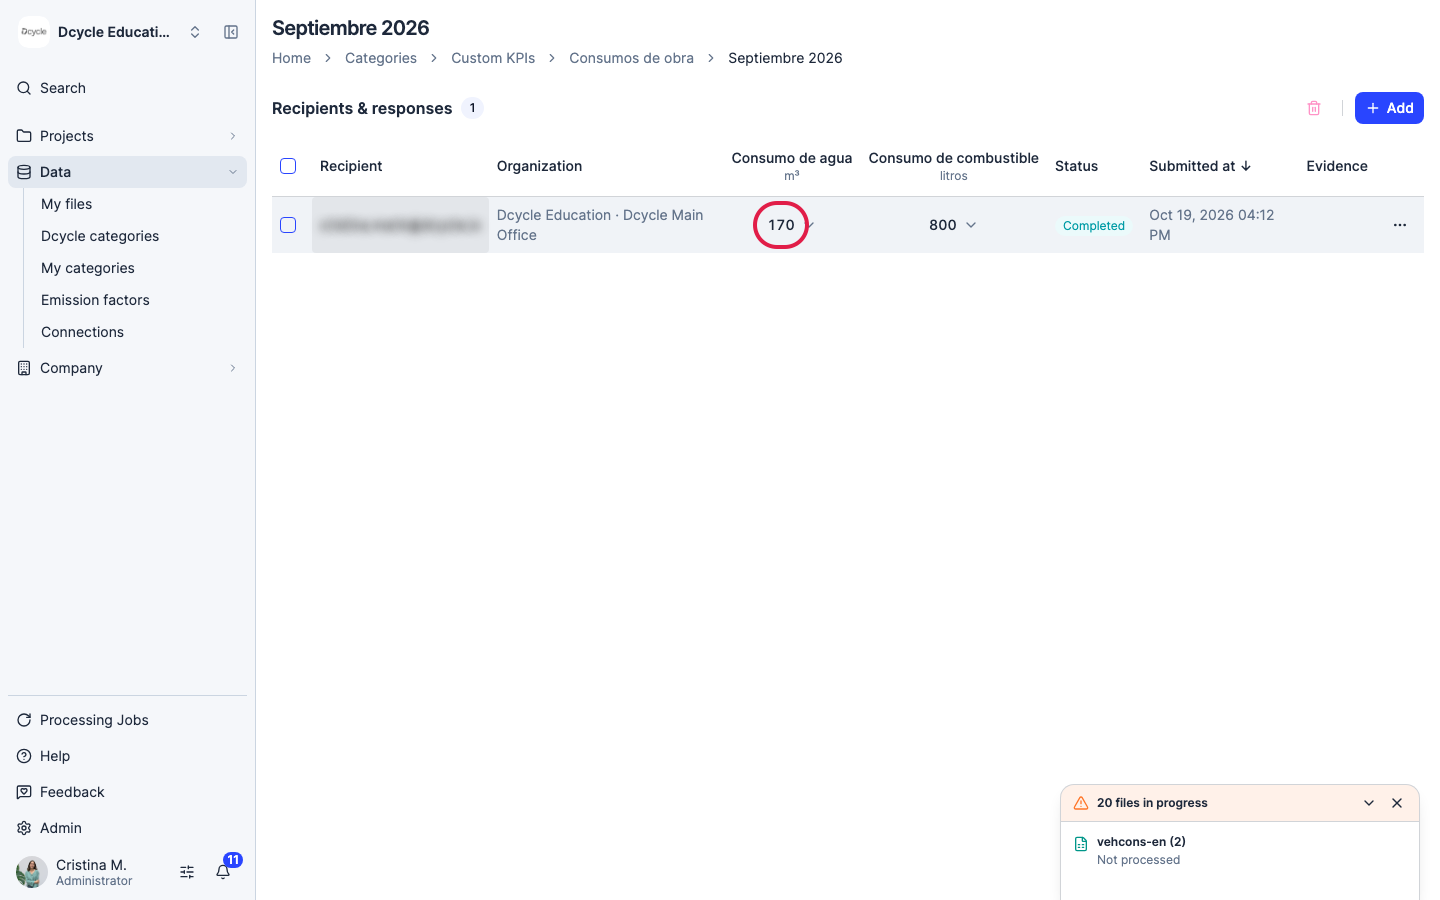
Step 18
You’ll see the breakdown by category. Only the categories the data owner filled in are listed.
Step 19
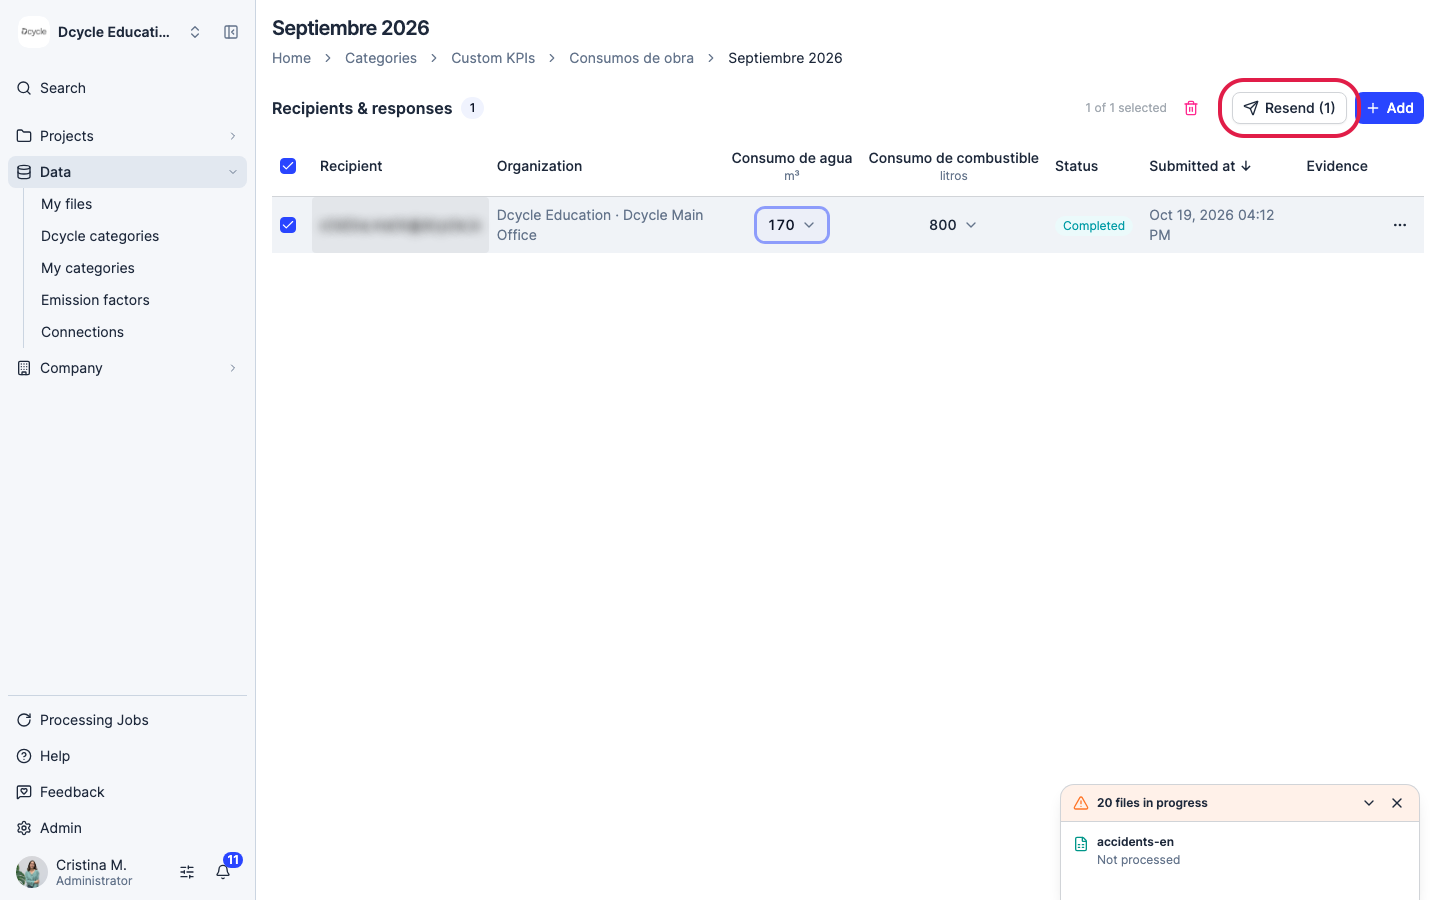
To remind people who haven’t answered, select them and click “Resend”. You can also resend to one person, or enter or edit their values yourself, from the “…” menu on their row.
Step 20
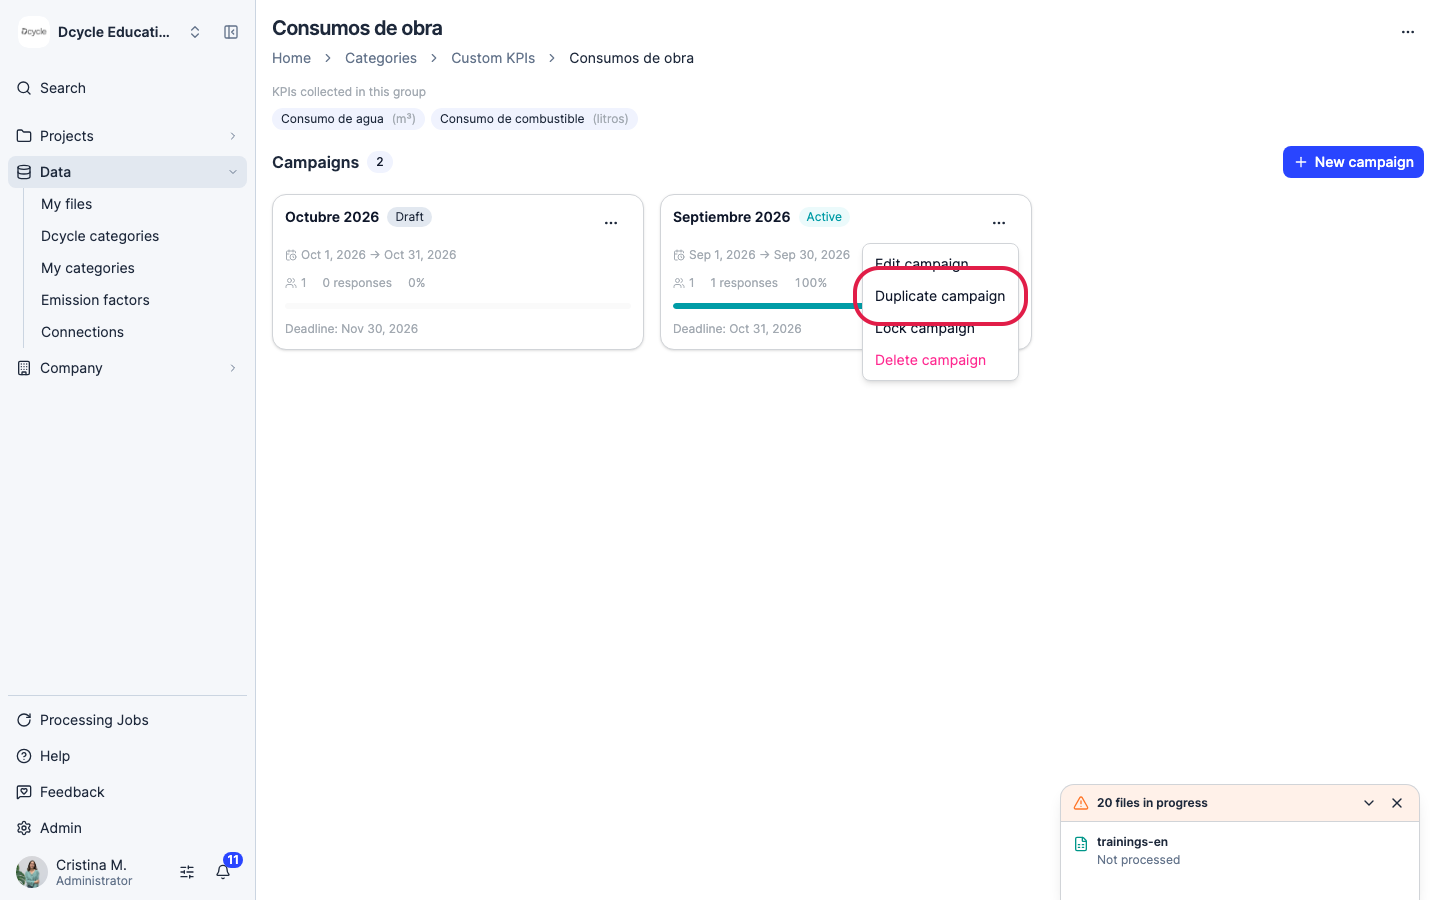
For the next period, open the “…” menu on a campaign and click “Duplicate campaign”. The copy keeps the same data owners, but no emails are sent and no values are copied. It stays as a Draft: use “Edit campaign” to change its name and dates, then launch it.
Step 21
When the collection period is over, use “Lock campaign” in the same menu to prevent further changes.
Was this helpful?
What was missing or unclear? (optional)
Sent. Thank you for helping us improve.